
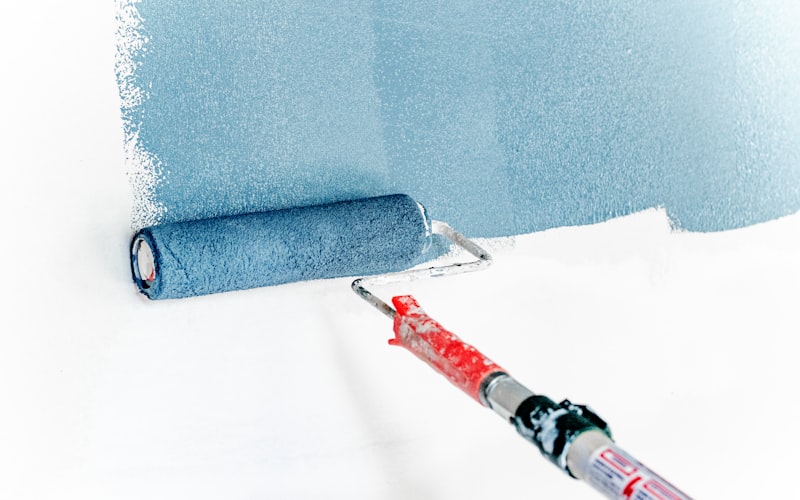
If you're looking for the single most impactful home upgrade per dollar spent, interior painting is almost impossible to beat. A fresh coat of paint transforms tired rooms, updates dated color schemes, and makes your entire home feel cleaner and more inviting. Whether you pick up a roller yourself or hire professionals, understanding the process, costs, and materials will help you get the best possible result.
DIY vs. Hiring a Professional Painter
The first decision most homeowners face is whether to paint themselves or hire it out. Both approaches have clear advantages, and the right choice depends on your budget, available time, and comfort level with the work involved.
The Case for DIY
Painting a room yourself typically costs $200 to $400 per room, covering paint, primer, tape, drop cloths, rollers, and brushes. The savings compared to hiring a professional are significant, often 50% or more. DIY also gives you complete control over timing and quality. However, you should realistically budget a full day per average-sized room (including prep and cleanup), and the results depend entirely on your technique and patience. Cutting clean lines around trim and ceilings is the most challenging part for beginners.
The Case for Hiring Pros
Professional painters charge $400 to $800 per room on average, though this varies by region, room size, and complexity. For that price, you get speed (a crew can paint an entire house interior in two to four days), clean lines, proper prep work, and the convenience of not spending your weekends on ladders. Professionals also carry insurance, so if something gets damaged, you're covered. For multi-room projects, whole-house repaints, or rooms with high ceilings, vaulted walls, or extensive trim, professional painters deliver noticeably better results in a fraction of the time.
Average Interior Painting Costs
- DIY (per room): $200-$400 (paint + supplies)
- Professional (per room): $400-$800 (labor + materials)
- Whole house DIY (3-bed): $1,500-$3,000
- Whole house professional (3-bed): $4,000-$8,000
- Accent wall (DIY): $50-$100
- Trim and doors (professional): $1,000-$3,000
Costs assume standard 10x12-foot rooms with 8-foot ceilings. High ceilings, extensive prep, or premium paints increase costs.
Understanding Paint Types and Finishes
Choosing the right paint finish is just as important as choosing the right color. Each finish serves a specific purpose, and using the wrong one in the wrong room leads to problems.
Paint Finishes Explained
- Flat/Matte: No sheen. Hides imperfections on walls and ceilings beautifully but marks and scuffs easily and is difficult to clean. Best for low-traffic areas like adult bedrooms and ceilings.
- Eggshell: A slight, soft sheen that's more washable than flat. The most popular finish for living rooms, dining rooms, and hallways. It balances aesthetics and durability well.
- Satin: A smooth, velvety sheen that handles moisture and cleaning well. Excellent for kitchens, bathrooms, kids' rooms, and high-traffic hallways. Shows imperfections more than eggshell.
- Semi-Gloss: A noticeable shine with excellent durability and moisture resistance. The standard choice for trim, baseboards, doors, cabinets, and bathrooms. It's easy to clean but highlights surface flaws.
- High-Gloss: Maximum shine and durability. Used primarily for trim and accent pieces. It's extremely wipeable but shows every imperfection, so surfaces must be perfectly smooth.
Paint Quality Matters
Budget paints ($20-$30/gallon) may seem like a bargain, but they typically require more coats, don't cover as well, and fade faster. Mid-range paints ($35-$50/gallon) from brands like Benjamin Moore, Sherwin-Williams, or Behr offer excellent coverage, durability, and color retention. Premium paints ($50-$75/gallon) provide the best one-coat coverage and longest life. For most homeowners, mid-range paint offers the best value.
Color Selection Tips
Color choice is where most homeowners feel overwhelmed. Thousands of options and the fear of making a costly mistake lead to analysis paralysis. These guidelines simplify the process:
- Start with your fixed elements. Look at your flooring, countertops, furniture, and fixtures. Your paint color needs to complement what's already in the room, not compete with it.
- Use the 60-30-10 rule. 60% of the room should be a dominant color (walls), 30% a secondary color (upholstery, curtains), and 10% an accent color (pillows, art, accessories).
- Test before you commit. Buy sample pots and paint large swatches (at least 12x12 inches) on different walls. View them at different times of day, because natural and artificial light change how colors appear dramatically.
- Consider the room's purpose. Cool tones (blues, greens, grays) create calm, relaxing atmospheres ideal for bedrooms and bathrooms. Warm tones (yellows, terracottas, warm whites) energize spaces like kitchens and living rooms.
- When in doubt, go neutral. Warm whites, greiges (gray-beige blends), and soft taupes are universally flattering and never feel dated. They also appeal to buyers if you're selling.
Prep Work: The Step Most People Rush
Professional painters often spend as much time on prep as they do on actual painting, and there's a reason. Proper preparation is the difference between a paint job that looks polished and one that looks amateurish.
- Clean walls. Dust, grease, and cobwebs prevent paint from adhering. Wipe walls with a damp cloth or TSP solution for greasy kitchen walls.
- Fill holes and cracks. Use lightweight spackle for nail holes and setting compound for larger dents or cracks. Sand smooth once dry.
- Sand glossy surfaces. Paint won't adhere well to shiny surfaces. Lightly sand with 150-grit sandpaper to create tooth.
- Prime when needed. Always prime over bare drywall, stains, dark colors you're covering with light paint, and surfaces that have been repaired. Tinted primer helps when making dramatic color changes.
- Tape carefully. Use quality painter's tape (FrogTape or 3M) along trim, ceilings, and edges. Press the edge firmly to prevent bleed-through.
- Protect floors and furniture. Use canvas drop cloths (not plastic, which is slippery and doesn't absorb drips). Move furniture to the center of the room and cover it.
Common Mistakes to Avoid
Even experienced DIY painters make these errors. Being aware of them saves time, money, and frustration:
- Skipping primer leads to uneven color and poor adhesion, especially on new drywall or over dark colors.
- Not maintaining a wet edge creates visible lap marks where dried and wet paint overlap. Work in sections and keep the edge wet.
- Overloading the roller causes drips and an uneven texture. Roll excess paint off on the tray before applying to the wall.
- Removing tape too late. Pull tape while the final coat is still slightly tacky. Waiting until it's fully dry risks peeling paint off with the tape.
- Only applying one coat rarely provides full coverage, even with premium paints. Two coats is the standard for a professional-looking result.
The most expensive part of a bad paint job isn't the wasted paint. It's having to do the entire project over again. Take the time to prep properly and apply two coats, and you'll be happy with the result for years.
Choosing a Painting Contractor
If you decide to hire a professional, vet your options carefully. The painting industry has a low barrier to entry, which means quality varies widely:
- Get at least three written estimates. Each should itemize prep work, number of coats, paint brand and finish, and timeline.
- Verify insurance. Require proof of general liability and workers' compensation before anyone enters your home.
- Check references and reviews. Look for consistent feedback on punctuality, cleanliness, and attention to detail.
- Discuss the paint. A quality contractor will use and recommend mid-range to premium paints. Be wary of anyone who quotes suspiciously low prices using unknown paint brands.
- Clarify what's included. Does the estimate cover moving furniture, patching holes, priming, and cleanup? Get everything in writing.